Installing fixed bollards requires precision to ensure both structural integrity and aesthetic alignment. Follow this professional 5-step process for a standard root installation.
1. Site Survey
Before breaking ground, it is critical to verify the environment.
- Layout Planning: Refer to the site plans provided by the client to mark the exact positions
- Utility Scan: Use a cable avoidance tool (CAT) to scan for underground cables, water pipes, or gas lines.
- Marking: Use professional marking tools to create a "crosshair" positioning line for each bollard to ensure perfect linear alignment.
2. Excavation
The strength of a bollard depends on its foundation.
-
Excavate a cube-shaped hole according to the fixed bollard’s specifications. After the concrete layer is removed, use an auger or post hole digger to dig the hole.
Note: For a 300mm root depth, the hole should typically be 300mm x 300mm x 300mm.
-
Pour a 150mm-200mm layer of crushed stone and coarse sand at the bottom of the pit. This "pad" prevents water from pooling at the base of the steel post, reducing long-term corrosion.
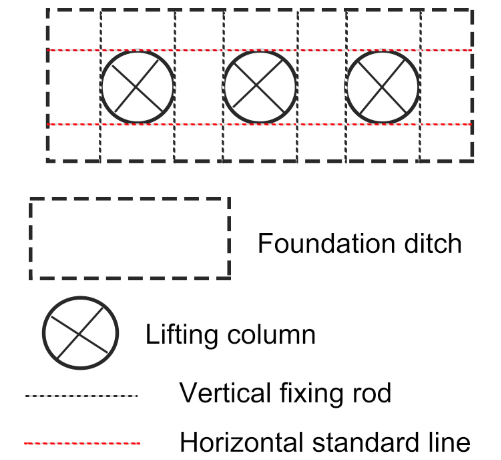
3. Positioning
This stage determines the final visual quality of the project.
- Setting: Lower the bollard centrally into the pit. Use a laser level or spirit level to ensure the post is perfectly vertical in all planes.
- To prevent displacement during the concrete pour, place temporary vertical fixing rods or stakes next to the bollard to hold it in place.
4. Concrete Pouring
Use high-quality concrete (Grade C30 or higher recommended) for maximum impact resistance.
- Foundation Pouring: Fill the excavated cube with concrete mix until it is level with the ground surface.
- Internal Core Filling: For pipe bollards, fill the internal cavity of the post with concrete. This significantly increases the structural strength and "anti-ram" capability.
- Cleaning: Immediately rinse off any concrete residue from the bollard surface with a soft cloth and water to prevent scratching or permanent staining.
5. Surface Finishing
- Tight Finish: Manually smooth the top surface of the concrete to ensure a flush look.
- Protection: Cover the fresh concrete with polythene sheeting for the first 24 hours, especially in cold or inclement weather, to ensure proper hydration.
- Curing Time: Do not subject the bollard to any impact or heavy use until the concrete has fully cured (typically 48–72 hours).
Contact Our Experts Now or email us at ricj@cd-ricj.com for a free consultation and a detailed quote within 24 hours.


